In moving to this streamlined technology, Blackboard will continue to incorporate best practices and deploy consistent and native Blackboard Learn workflows for all partner integrations, including:
- Single sign-on provides instructors and students with the convenience of one login for all course resources.
- Automated gradebook refresh ensures all assignment grades appear in the Blackboard Grade Center, saving instructors’ time.
- Compliance with student data privacy laws, such as the Family Educational Rights and Privacy Act (FERPA), ensures sensitive student information remains protected and secure.
Glossary
The following table summarizes some important concepts used in this document:
Term | Description |
Content Area | A content area is a content structure within a course that is often linked to from the Course menu and organizes course folders, items, and other materials into logical groupings. |
Building Block | A Building Block is an application module that extends the functionality of the Blackboard Learn platform. |
System Admin Panel | This is the tab visible only to system administrators that contains a collection of links to tools targeted to the administration of the Blackboard Learn platform. |
Step | A logical grouping of fields, instructions, and other elements within a data collection form in the Blackboard Learn platform. |
Configuring the Partner Cloud Integration
For the latest details on the Partner Cloud Building Block including the latest feature updates, configuration steps, supported versions, and all technical considerations, please reference the latest Partner Cloud Building Block Admin Guide and Release Notes on Behind the Blackboard.
Configuring the myBusinessCourse Integration
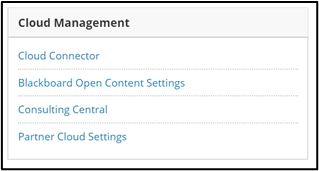
- From the Administrator Panel, locate the Cloud Management module and select the Partner Cloud Settings option.
- Locate the Configure and Activate Partners Available Through the Partner Cloud section and the Partner option. Select Settings in the contextual menu. This will direct you to the configuration page.

- When selecting Settings, the myBusinessCouse Setting page is launched.
- Click on the Register with Tool Provider button below the Register site with MyBusinessCourse section. A new window or tab will load, and a message will appear saying your site has been registered successfully. Once registration is completed, return to the setting page, and continue to Step 5.
- The Share User Information option specifies how information should be shared between the Blackboard Learn and myBusinessCourse servers. myBusinessCourse recommends setting this to Yes to help with the student registration process.

 Yes indicates that user information will be shared for this specific partner. This includes the user first name, last name and email address.No indicates user information will not be shared for this specific partner.User Choice indicates that each individual user will be prompted to decide how their information should be sent upon their first launch of any partner link.Default from Building Block indicates that the Building Block option will be used.
 - The Share Course Information option specifies how course information should be shared between the Blackboard Learn and partner servers.
 Yes indicates that course information will be shared with myBusinessCourse.No indicates course information will not be shared with myBusinessCourse.Default from Building Block indicates that the Building Block option will be used.
 - The Do you want to enable the following details with myBusinessCourse option specifies how user, course, grade, and membership information should be shared between the Blackboard Learn and partner servers.
 User Fields to Send indicates that selected Blackboard Learn user information will be shared with myBusinessCourse.
Allow Grade Service Access indicates myBusinessCourse will provide grade information to course.
Allow Membership Service Access indicates that the myBusinessCourse integration has the ability to view course membership information. - The option for Specific Institutions allows extending any multi-institution configuration, which allows only a subset of applicable courses to access the myBusinessCourse integration. Once Yes is selected, Available Institution Identifies may be moved to the Selected Institution Identifiers list. The Selected list will receive access to the myBusinessCourse integration.NOTE: Once Yes is selected, at least one Institution Identifier must be selected.

- Select Submit to save all changes.
- Upon submission, the registration process will occur, and the Registration Status will be updated to indicate either a successful or failed registration.
- Upon a successful registration, the partner integration can be made available to the instructor by returning to the Configure Partner Cloud.
Locate the Configure and Activate Partners section and the desired partner option. Within the columns Content and Tools and Material Provider, the partner may make available by toggling the option to ON.
Removing Access to the myBusinessCourse Integration
- From the Administrator Panel, locate the Cloud Management module and select the Partner Cloud Settings option
- Locate the Configure and Activate Partners section and the myBusinessCourse option. Select the ON button and set to OFF, the option can be toggled between ON and OFF for availability. Selecting OFF will disable the partner integration.
- Click Submit.
Enabling Partner Cloud Tools
When the Building Block is set to Available, the related Partner Cloud Tools are not made available automatically.
These are the steps to make the Partner Tools available:
- From the Administrator Panel, click Tools within the Tools and Utilities module.
- Select the All Tools option under Filter By:
- Locate the Partner Cloud Tools:
- Select the Availability as ON or OFF by clicking on the ON/OFF value. Once your option is selected, the Scope of Change can be set.


 Note: The Partner Cloud Tools are not available to guests or observers.
 - Click Submit.