eReader pages that have notes in them will have a note icon in the upper-right corner. This serves as a counter for the number of notes on that page, and a quick link to your notebook.

Add or View Notes
From within the eReader, use the following steps to add and view annotations.
- With your cursor, highlight the text that you wish to annotate.

Text highlighted in the eReader. - Click the Note icon,
 to add notes(optional), select Read to have the highlighted text be read aloud, select Flashcard to make the highlighted text a flashcard, or select a highlight color.
 - If you select the Note, you will have a pop-up appear. You can enter any additional notes you would like or add a tag.

- Select the Add Note button to save the annotation.
- Clicking the highlighted text allows you to see your notes, edit the annotation, or delete the annotation.
- You can also change the highlight color of an annotation after it has been created.

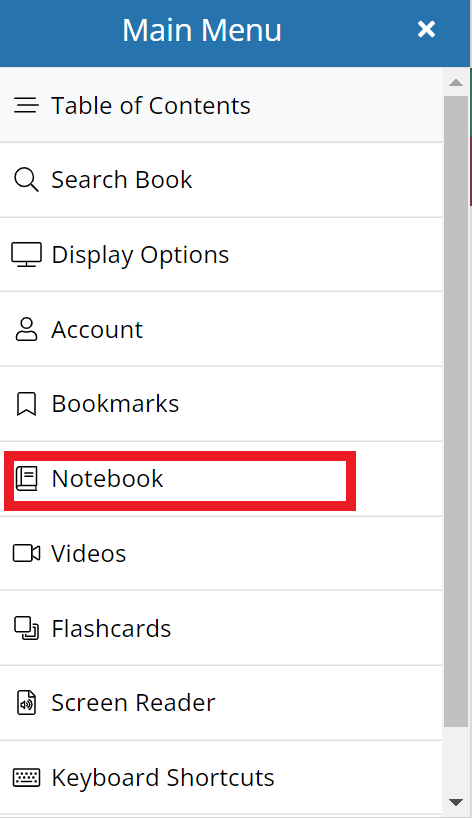
- Navigate to pages that have annotations using the Main Menu on the left by clicking on the Notebook in the list.
You will also have the option to print annotations from within the menu.

Filter Notes
If you'd like to filter through your different notes, you can now filter notes by the current page.

Instructor's Shared Notes
- Instructors can share their annotations with students. Your instructor may not use this feature so please contact him or her if you have questions about their notes.
- Any student who is enrolled in an instructor’s course will see shared annotations in the eBook. If you have more than one instructor, you will see the name of which instructor created the annotation you're viewing.
- Your instructor's notes will appear as purple. They will show within your notebook, as well as on the page. You can click the highlighted text to see more on the note.


- Students can toggle instructor annotations on or off. They can also print their instructor’s annotations.